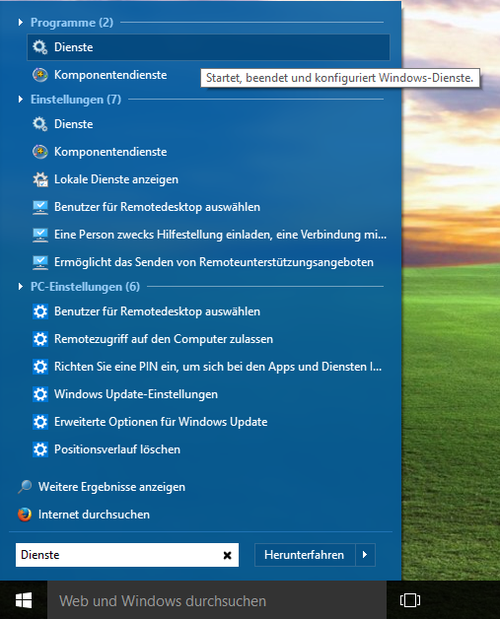
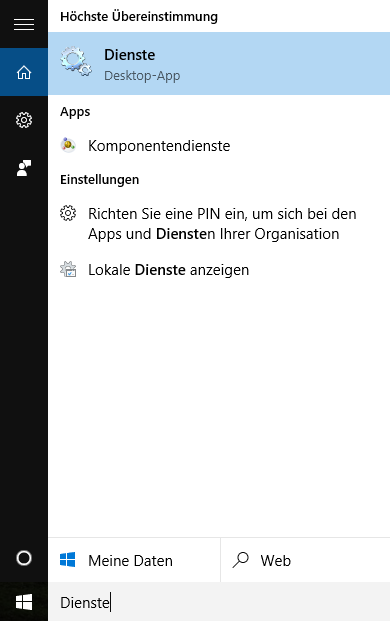
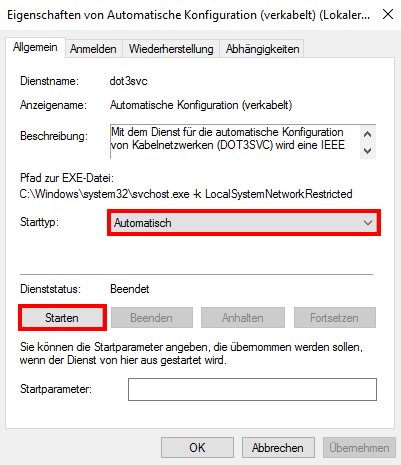
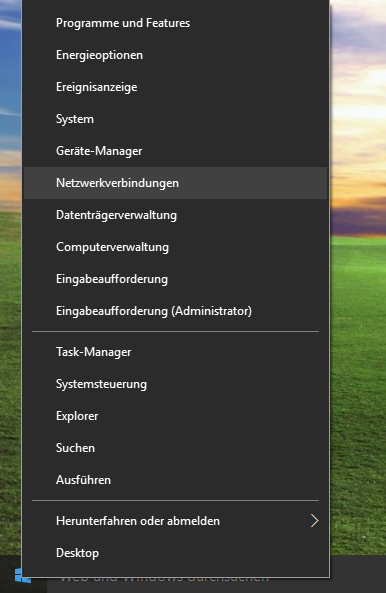
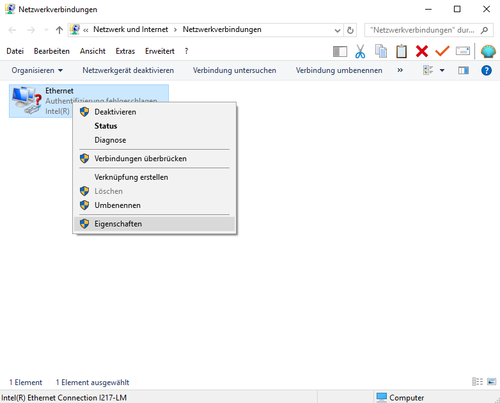
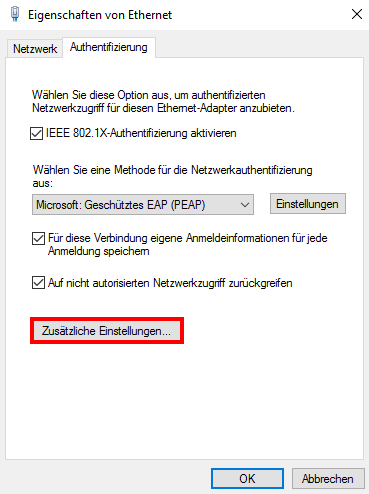
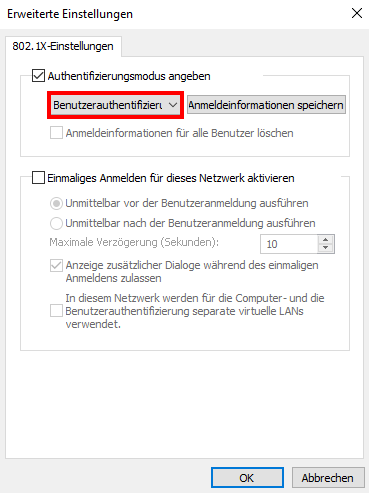
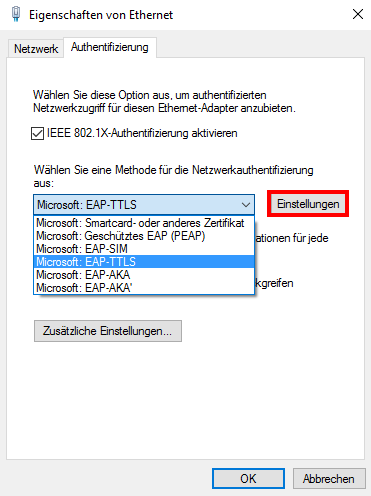
These instructions describe how to authorise yourself with 802.1X on the wired network. This is necessary if you do not receive a wifi signal with your laptop.

It is important that the socket to be used has previously been switched into the 802.1X network. This is done via the corresponding application form.

The instructions were created for Windows 10, but also apply to Windows 7 and Windows 8.1.

Step 1

Click on the Windows symbol at the bottom left and type “Services” into the search field.

Or without Classic Shell:

Step 2

Find the item Automatic configuration (wired) and open the properties by right-clicking.

Step 3

In the properties, change the start type to Automatic and start the service. Then confirm with OK and close the window.

Step 4

Windows 10 is now already asking for the login. Please enter your university login plus @uni-leipzig.de and the corresponding password here. If the login is not requested, this will come at the end of the settings.

Step 5

Next, go to the Control Panel and open the Network and Sharing Centre.

Or without Classic Shell:

Step 6

In the next step, open the adapter settings by clicking on Change adapter settings.

Step 7

Then select the connection and right-click on it. Then select the properties and open them.

Step 8

Check the box for Specify Authentication. Then select User Authentication from the drop-down menu and click OK.

Step 9

Select “Microsoft: EAP-TTLS” as the method for network authentication and then click on Settings.

Step 10

Check the box “Activate identity protection” and enter eduroam@uni-leipzig.de. Also check “T-Telesec Global Root Class 2” and “No user prompt if server cannot be authorised”. The client authentication is to be set to EAP foreign authentication method - unencrypted password (PAP).

Step 11

Close all windows with OK and now log in, if this has not already been done in step 4. Please enter your Uni-Login plus @uni-leipzig.de and the corresponding password here.