A digital signature replaces your manual signature online. With the help of your valid certificate issued by the DFN and the following instructions, you can make your emails and PDFs private.

Erste Schritte
- The first step and prerequisite for setting up a digital signature is the user certificate.
The user certificate is your digital ID. It is offered via the ‘TCS’ (Trusted Certificate Service) service of the European research network GÉANT and is provided by the external provider Harica.
In order to use the service, the applicant's identity must be successfully verified. This has already been done for the majority of Leipzig University employees. If the identity check has not yet been carried out, you will receive a corresponding notification stating how this can be done.
Log in to the application portal for user certificates with your university login.
Click 1 Once you have successfully logged in to the portal, your data will be displayed automatically. Now select the desired e-mail address for which you would like to generate the certificate.
You must memorise the password displayed for your private key and keep it safe. Please confirm this in the field below. You will need it to integrate the certificate in the respective application. The password cannot be recovered; if it is lost, the certificate must be cancelled and a new one requested.

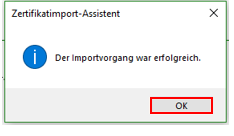
Click 2 You can now send the certificate request. Once your user certificate has been successfully issued, you will receive an email from the sender address noreply-tcs(at)uni-leipzig.de with information and your user certificate (.p12 file) attached. There may occasionally be delays (up to two working days) in the issuance of the certificate by the provider and the subsequent delivery of the e-mail.

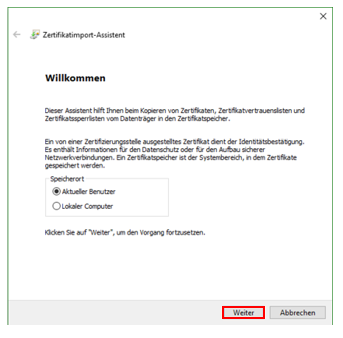
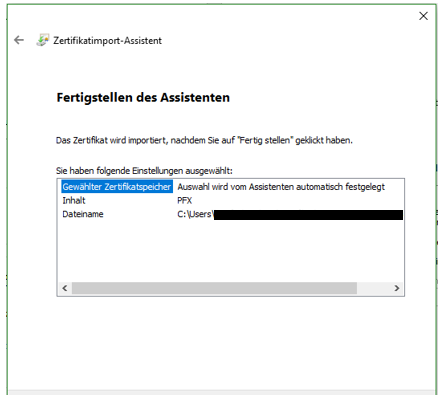
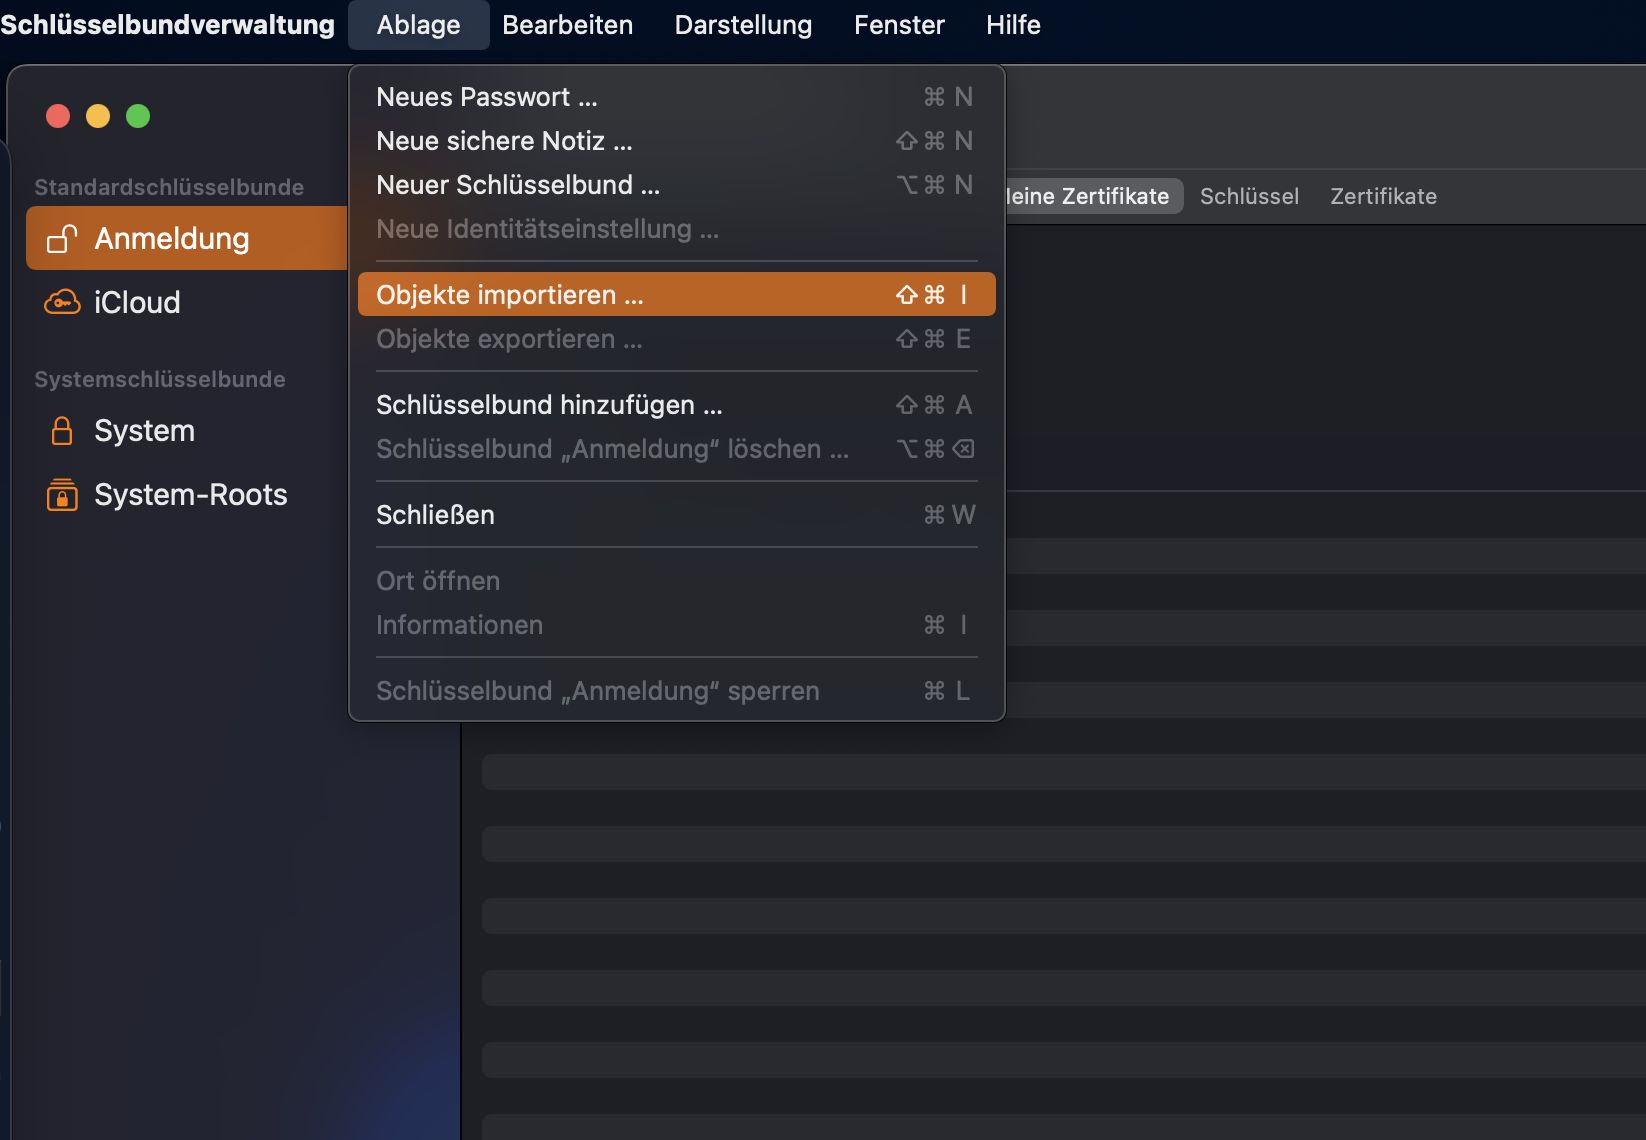
Step 3
Now click on ‘File’ in the menu bar at the top of the screen and navigate to ‘Import object ...’.
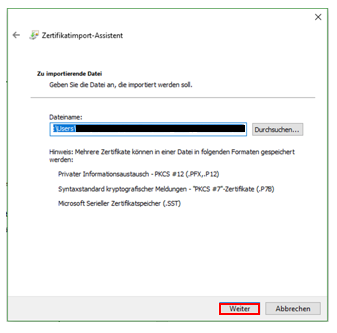
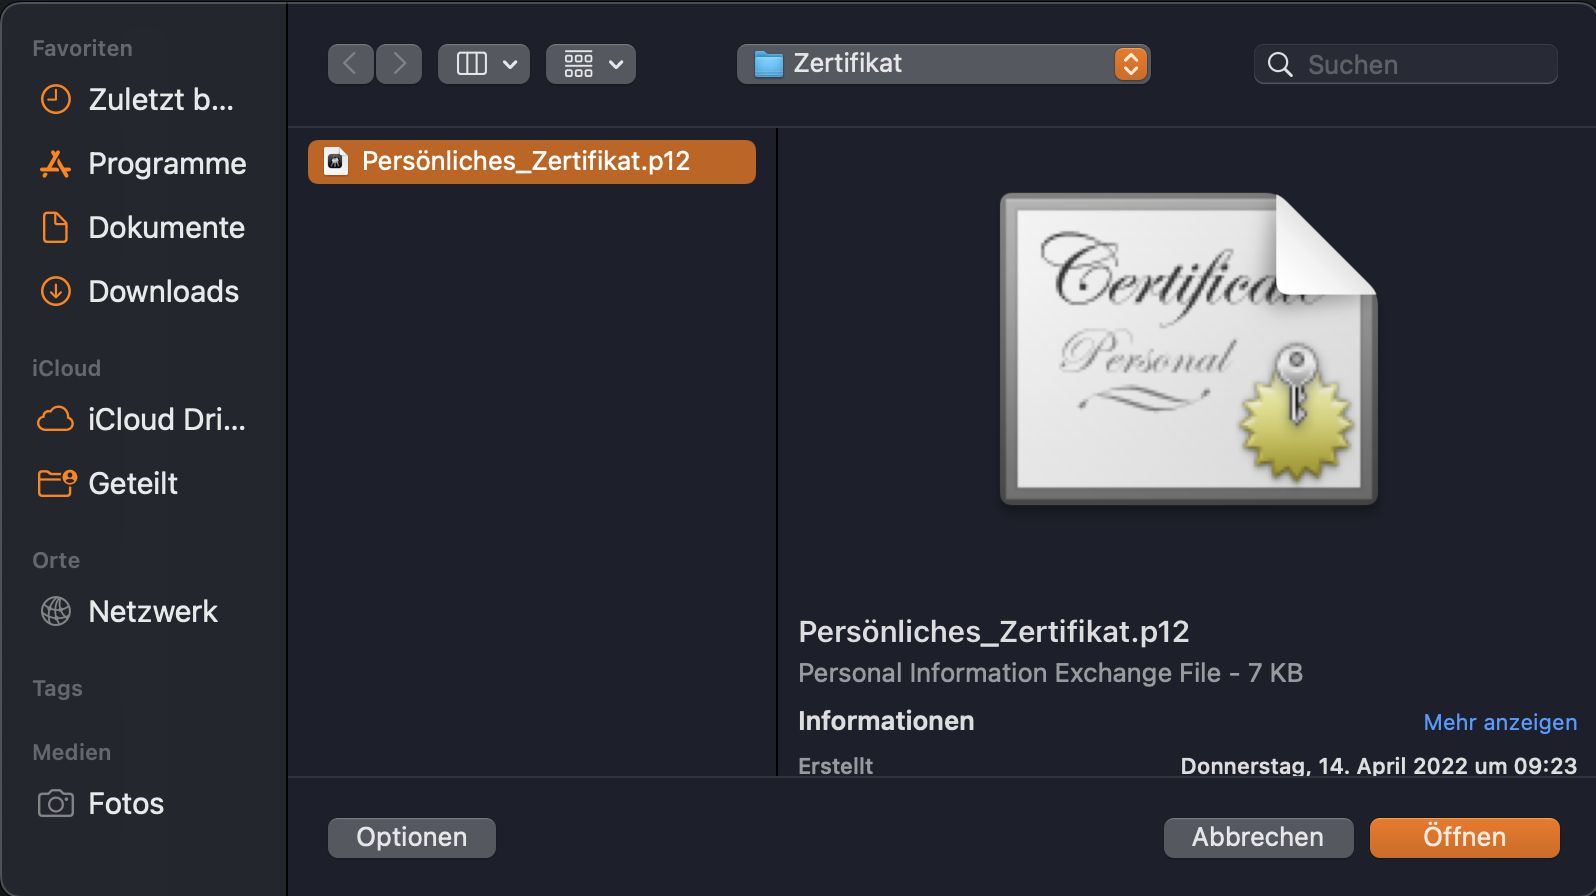
Step 4
Then navigate to the storage location of your certificate file (.p12) and select it by clicking ‘Open’.
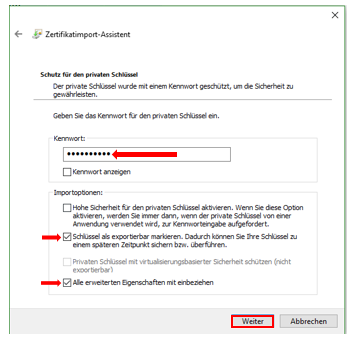
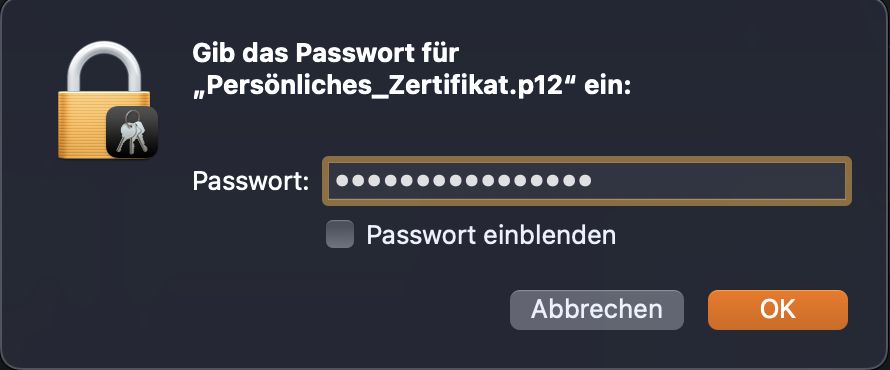
Step 5
You will now be asked to enter the password for the certificate, which is the private key (password) you specified when you requested the certificate.
Anleitungen
Step 4
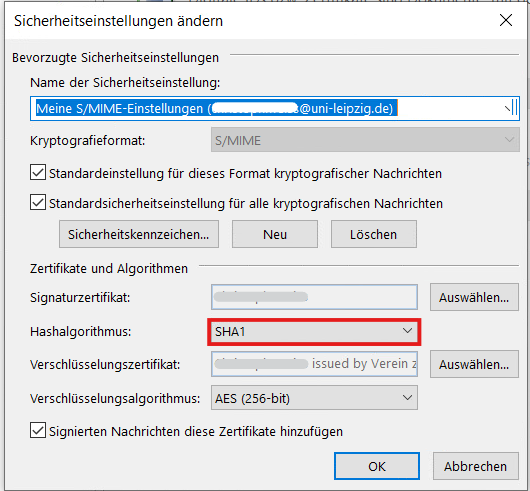
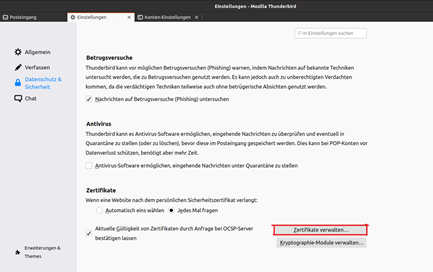
Navigate to ‘Email security’. Check whether the selected fields are ticked. If the boxes were ticked or you have successfully ticked them, click on ‘Import/Export’.

Step 6
Close all dialogue windows opened in Outlook with ‘OK’.
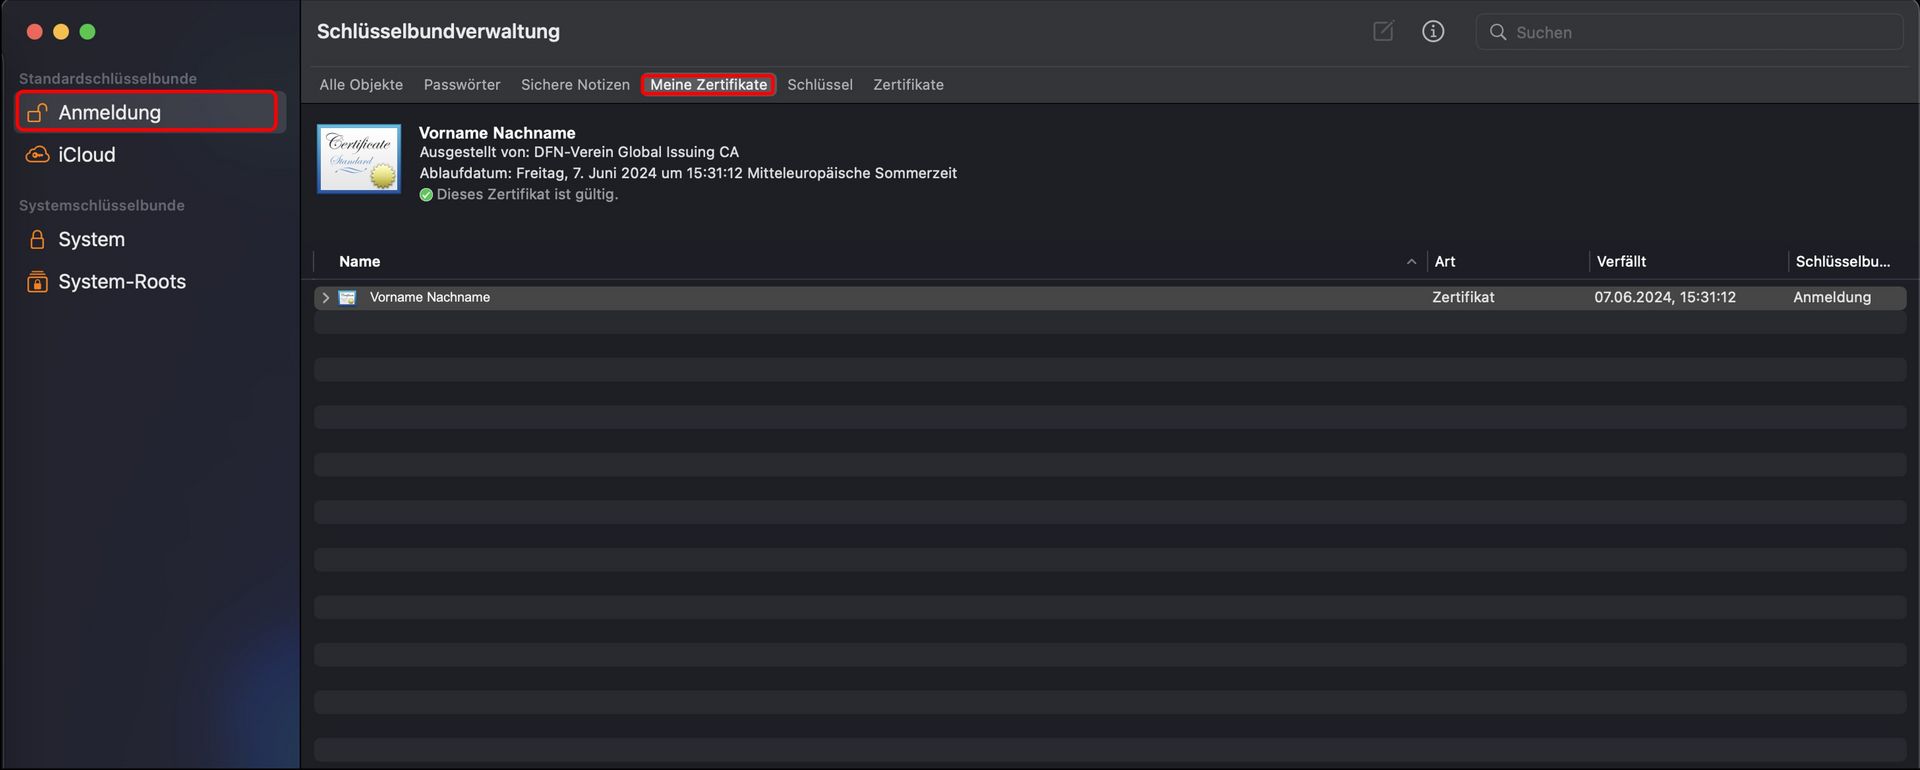
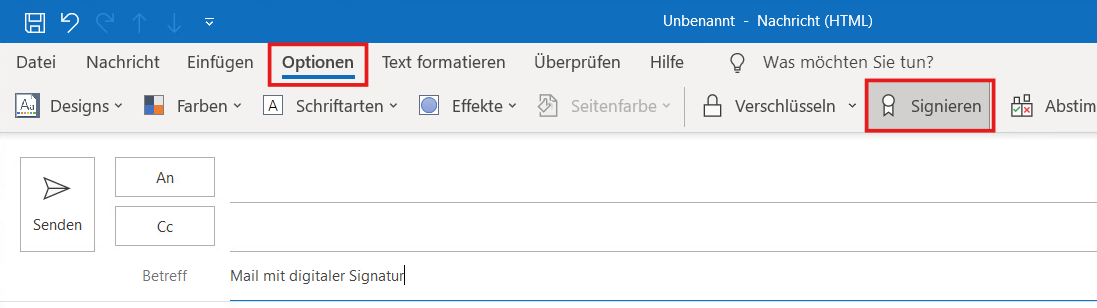
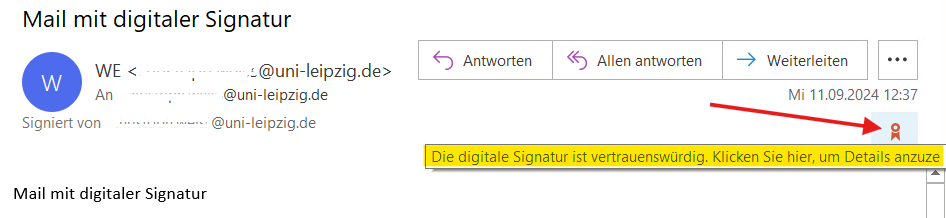
You can now check whether the settings are working correctly. Send a new e-mail to your own e-mail address. Check whether the ‘Sign’ option is activated:
Use multiple certificates
Repeat step 1 to step 4 if necessary.
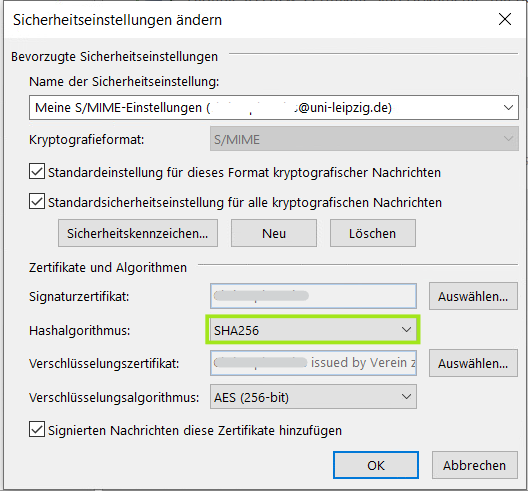
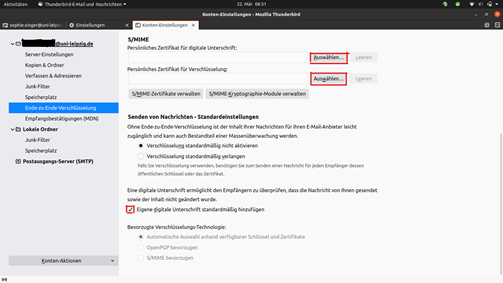
Click on ‘Select’ for the ‘Signature certificate’.
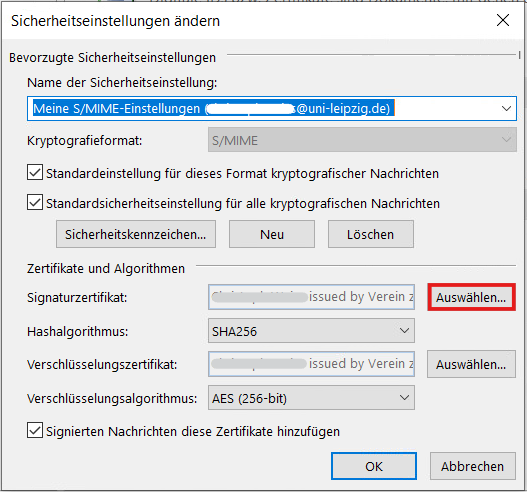
Under ‘Further options’, you can select which certificate should be actively used from the installed certificates.

Step 2
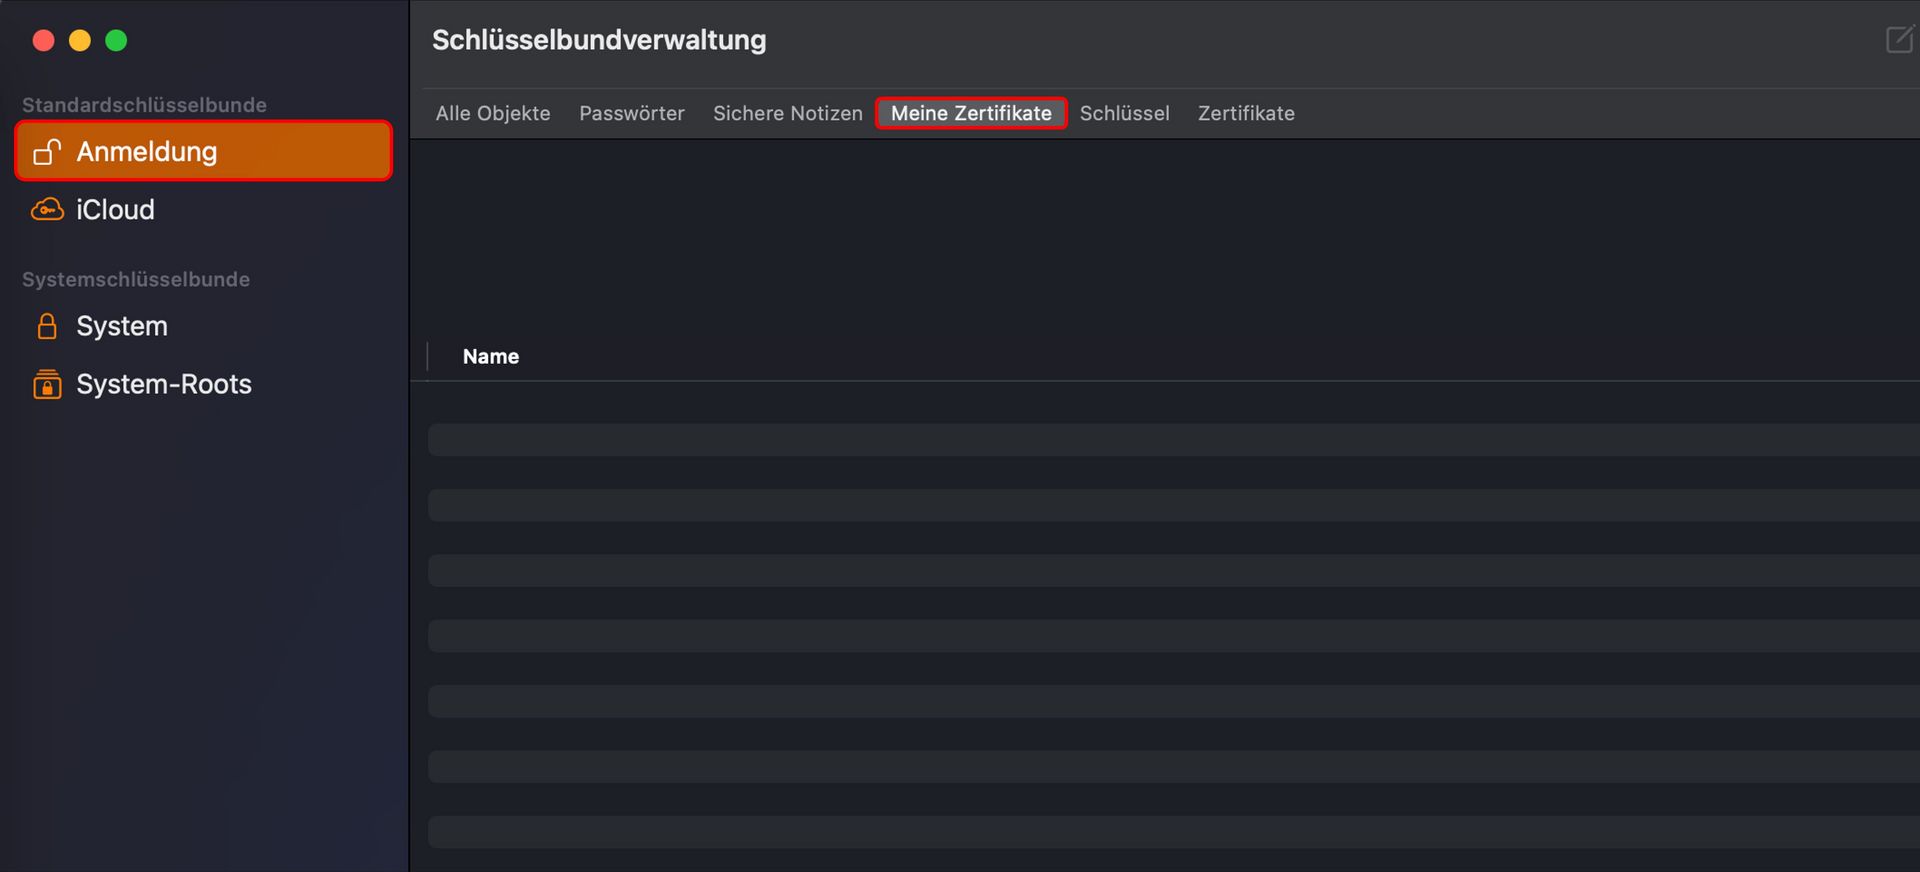
The ‘Certificate management’ dialogue window opens. On the ‘Your certificates’ tab, select the ‘Import’ button.
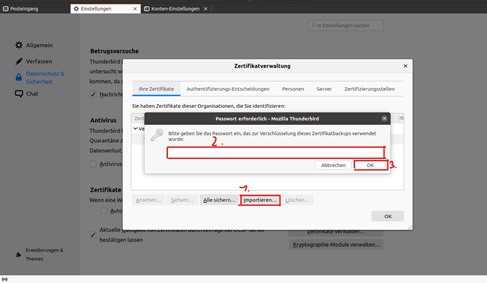
Now select ‘Your certificate file’ and confirm with ‘Open’.
When opening the personal certificate file, the password that you assigned when saving the certificate is requested.
Step 3
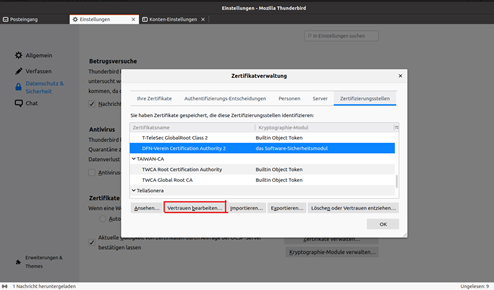
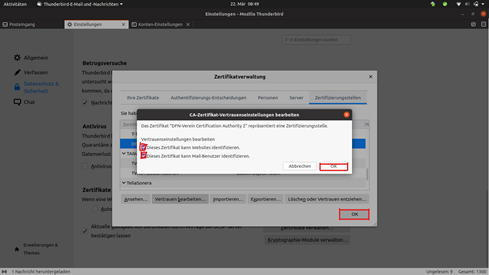
Then go to ‘Certification Authorities’, search for ‘DFN-Verein Certification Authorithy 2’, click on it and select ‘Edit trust’.
The basic configuration of Adobe Reader is pre-installed on all computers in the domain.
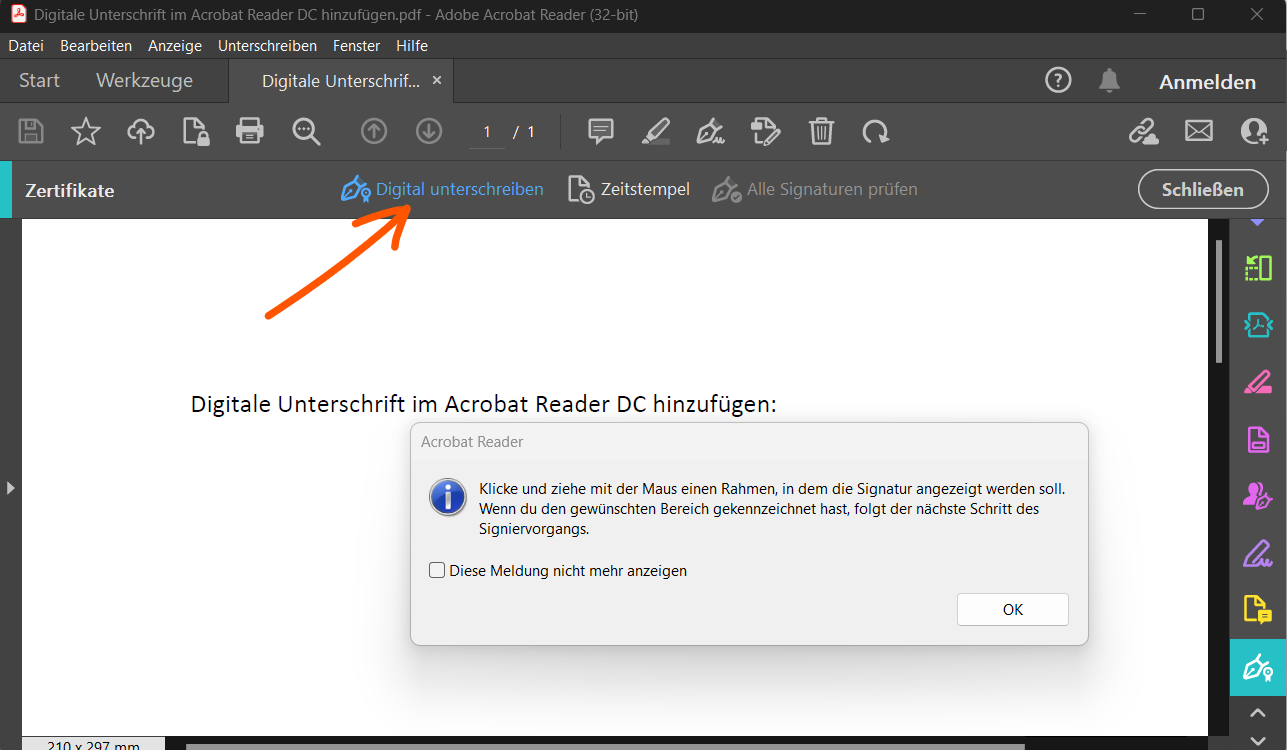
Step 1
Go to ‘Settings’ under “Editing” and then to the left tab under ‘Signatures’.
Step 2
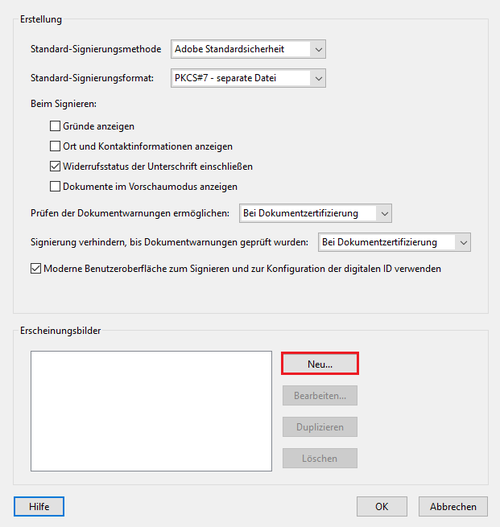
Under ‘Signatures’ → ‘Creation and appearance’, go to ‘More’. A new window will now open. Among these, select ‘Appearance’ → ‘New’ from.
Step 3
Now enter your name in the ‘Title’ field, select ‘Imported graphic’ and upload the university logo. Click on ‘Okay’ to finalise the step.


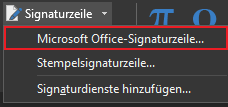
Step 3
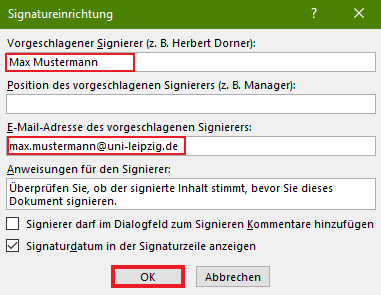
Now a window opens where you enter your name, your position and your e-mail address and then click on okay.
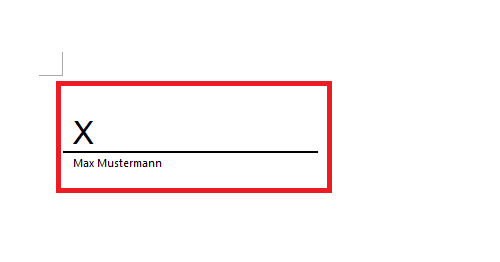

Step 6
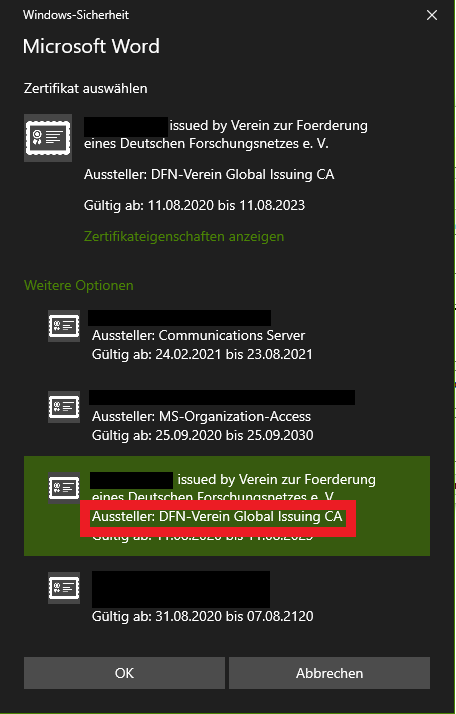
Enter your name here again and make sure that under Issued by: ‘DFN-Verein Global Issuning CA’ if not go to Change and select the correct certificate as under point 7.
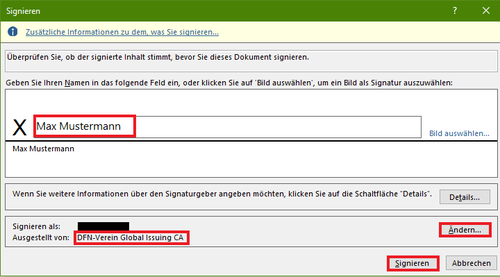
Step 7
Now select the certificate where the issuer is the: ‘DFN-Verein Global Issuing CA’ and click on ‘OK’, then click on Sign as in point 6.
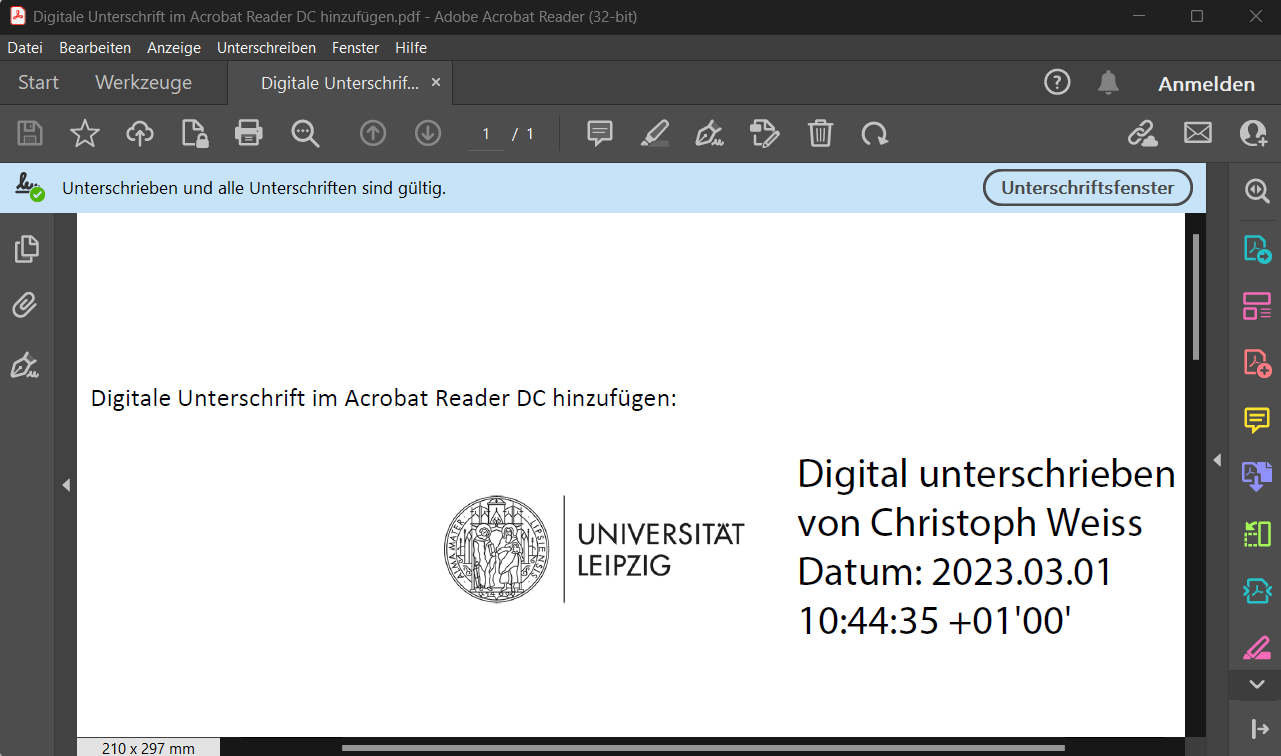
Step 8
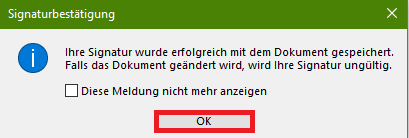
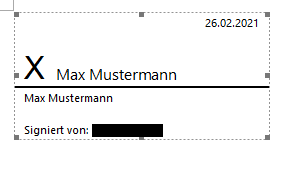
You must now confirm the signature. You can no longer edit the file otherwise remove your signature.
FAQ
Your user certificate is an identification document that must be protected from access by other people. The URZ therefore offers you the following recommendation from Cryptomator for secure storage.
Encrypting files with Cryptomator
The URZ recommends the ‘Cryptomator’ tool for encrypting files, as it is an open source-based encryption programme.
- It offers the option of storing encrypted files in a cloud so that even the cloud is no longer able to read these files.
- By creating encrypted vaults, it is possible to store your data securely in your drive.
The URZ has created detailed instructions for you